|
Using Web Email
Web
Email allows you to:
- Read,
reply, forward and compose emails
- Store
and retrieve emails from custom folders you create on
the mailserver
- Store
email addresses in your personal address book.
- Keep
track of important events with your personal calendar
In this
tutorial we'll show you how to retrieve your email, compose new emails,
reply to emails and how to use remote folders on the mailserver. This
web email program has numerous other functions which you can explore by
examining the preferences, folder options and other menu items.
Accessing
Web Email
1.
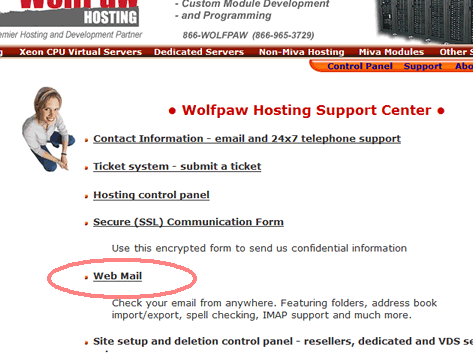
From the Support page click on 'Web Mail'.
2.
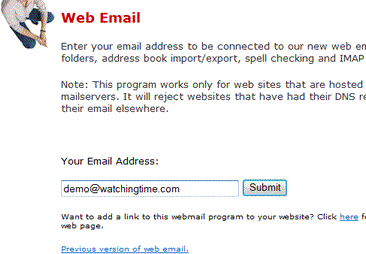
Enter your email address and click 'Submit'.
3.
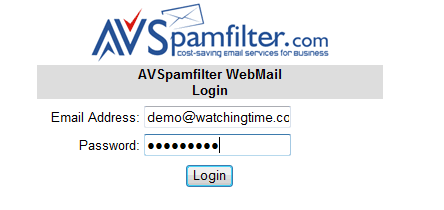
Enter the password for this email address and click 'Login'.
A
Quick Look at the Controls
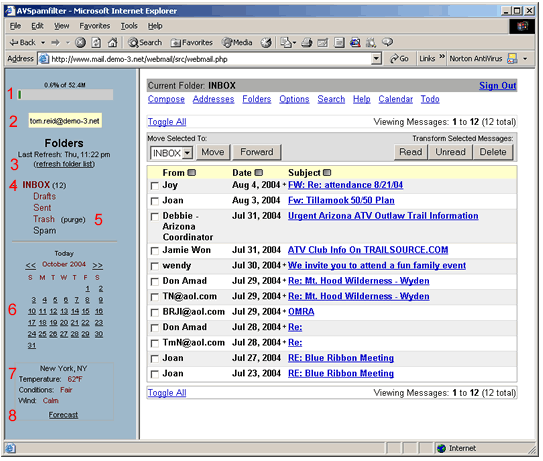
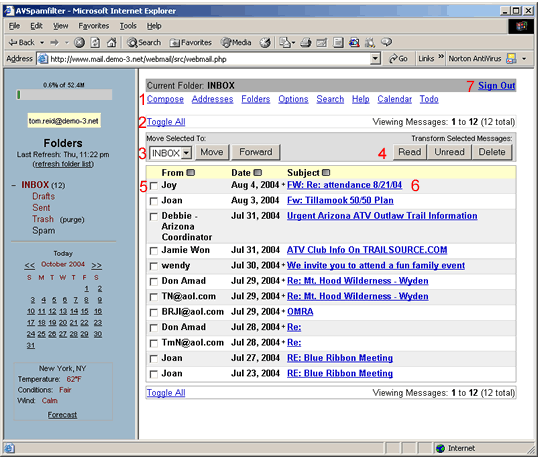
1. Here's
a snapshot of the main IMAP web email screen. In the left-hand window
are the following items:
- Bar chart
showing your mail storage quota and percent used.
- Your
email address
- If you
have added or deleted email folders click here to refresh your folder
list.
- Your
email folder list. Work with a folder by clicking on its name.
- Click
here to empty your trash folder. Deleted emails end up in the trash
folder which will need to be emptied.
- Your
personal calendar. Click on any day to see what's scheduled.
- Your
local weather forecast summary. Your can select your city using the
Options Menu.
- Check
the detailed weather forecast.
2. The right-hand
window has these items.
- Menu
bar. Click on a link to compose emails, edit your address book, add/change/delete
folders, etc.
- Click
on 'Toggle All' to change all emails from being selected to being deselected
or the reverse.
- Use the
drop-down menu to pick the folder to move or forward selected emails
to. Then click on 'Move' or 'Forward'.
- You can
mark selected emails 'Read', 'Unread' or have them deleted by clicking
on these buttons. Note that you must click on 'purge' next to the 'Trash'
folder to empty the trash of deleted emails.
- Click
the checkbox next to an email to select or deselect individual emails
for Move, Forward, Read, Unread and Delete functions.
- Click
on the subject of an email to read it.
- Click
here to sign out.
Reading
Email
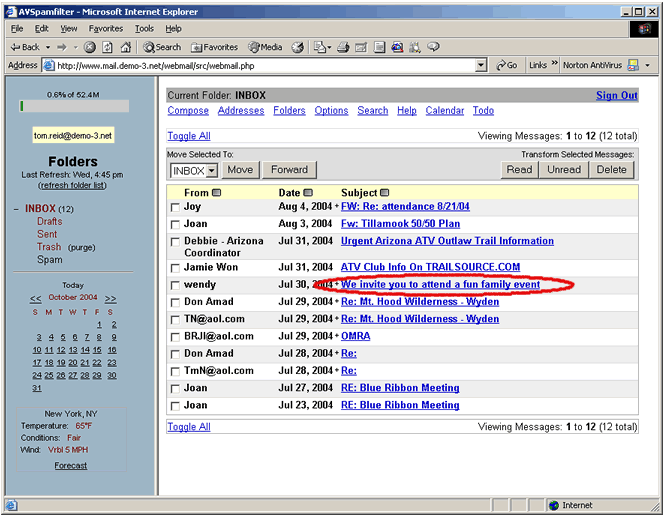
1. Click
on the email you'd like to read.
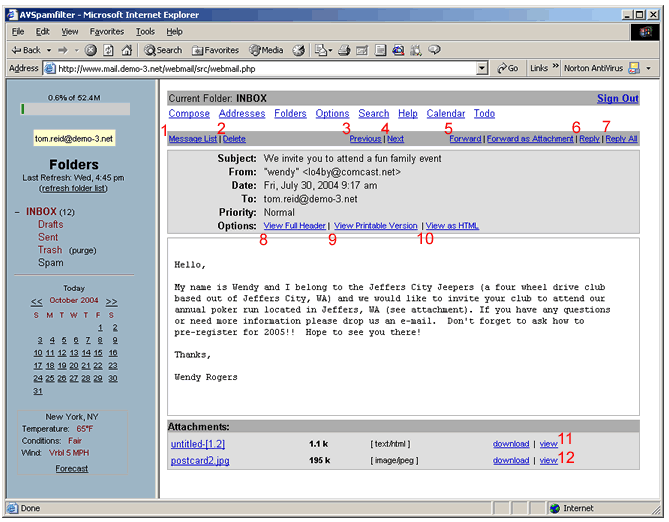
2. The email
opens for reading. The controls that are available when reading an email
are as follows:
- Message
List - return to the list of emails
- Delete
- delete this email
- Previous
- switch to the previous email
- Next
- switch to the next email
- Forward
- forward this email to another address
- Reply
- write a reply to this email and send it to the 'From' address
- Reply
All - send your send to the sender and all recipients of this email
- View
Full Header - view the detailed email header showing all mailservers
the email passed through
- View
Printable Version - re-format the email for printing.
- View
as HTML - for security reasons the default is to view an email as text.
However you can switch to HTML mode with this link.
- View
Attachment - click here to view the first attachment to this email
- View
Attachment - click here to view the second attachment to this email
Replying
to an Email
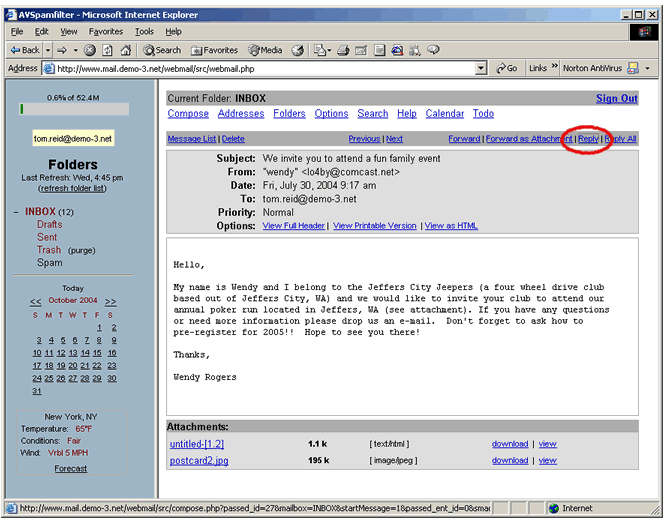
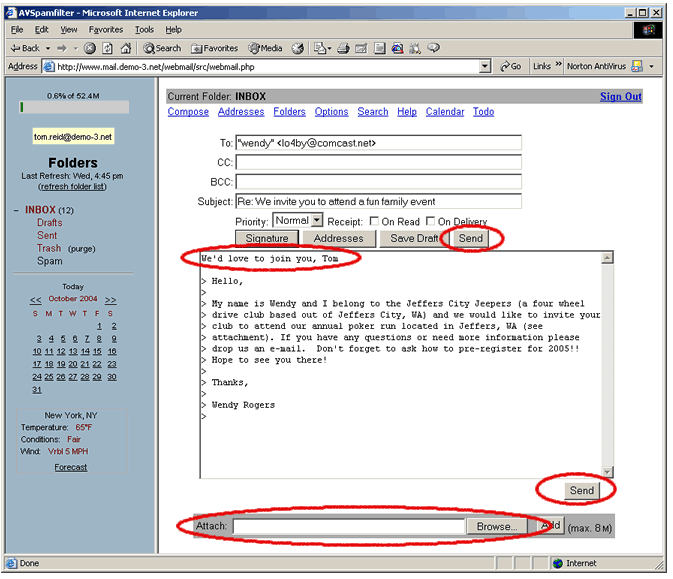
1. Click
on reply.
2. Click
at the top of the compose box and enter your reply. If you have any attachments,
you can add them using the browse box at the bottom. Then click on 'Send.'
Composing
an Email
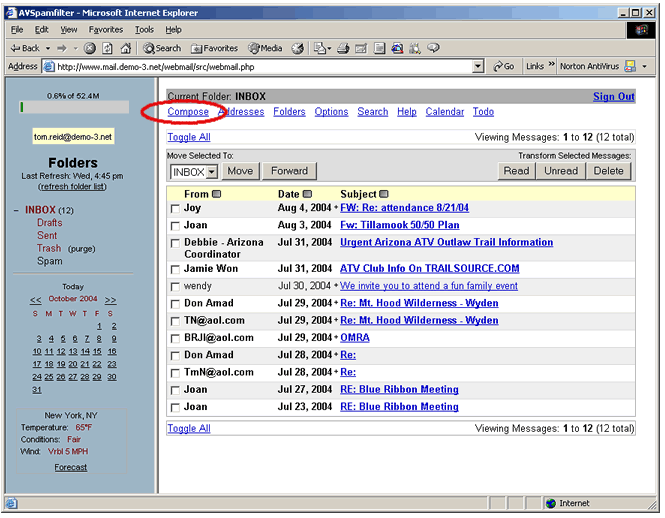
1. Click
on Compose.
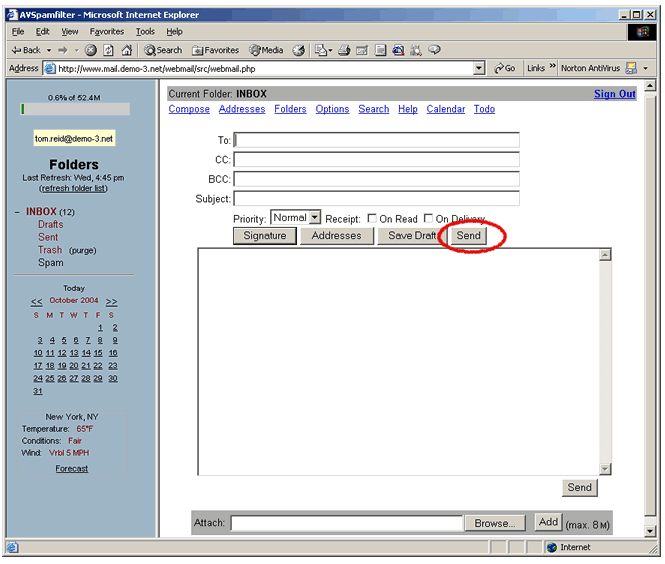
2. Here's the email
compose screen. Enter the recipient's email address, any 'cc' or 'bcc'
addresses, the subject and body of your email. Then click on 'Send.' You
can add attachments using the browse window below.
Creating
Folders
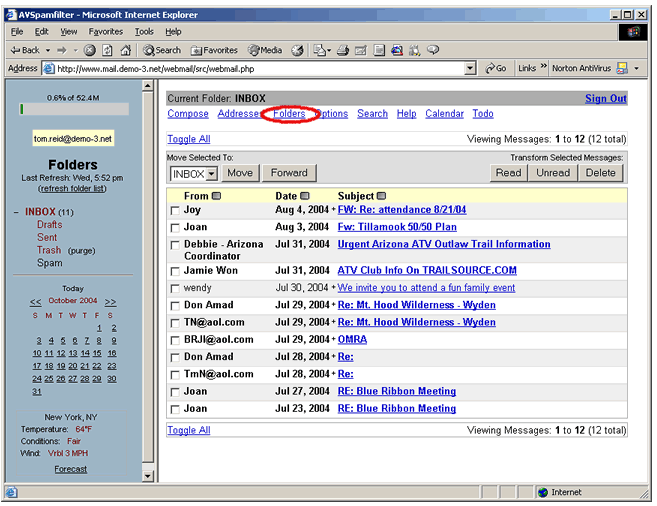
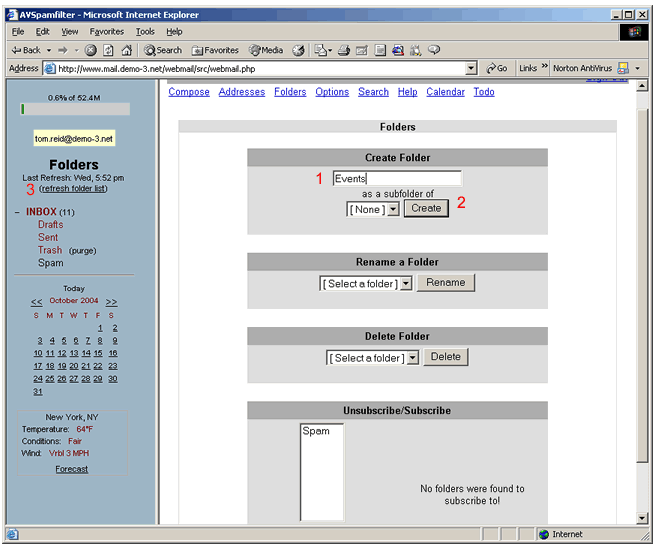
1. Click
on Folders.
2. Enter
the name of the new folder (Events) and click on the 'Create' button.
The click on 'Refresh Folder List.'
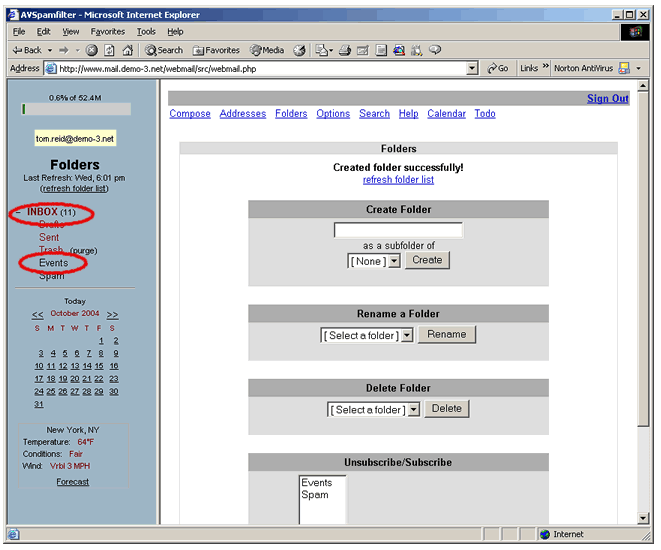
3. The folder
events has been added to the folder list. Now click on 'INBOX' to return
to the message list.
Saving
an Email in a Folder
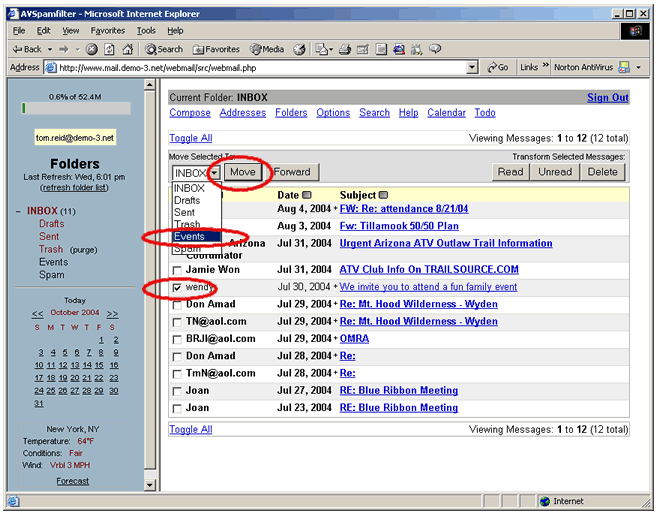
1. Check
the email to be saved. Then pull down the folder list, select the folder
and click on the 'Move' button.
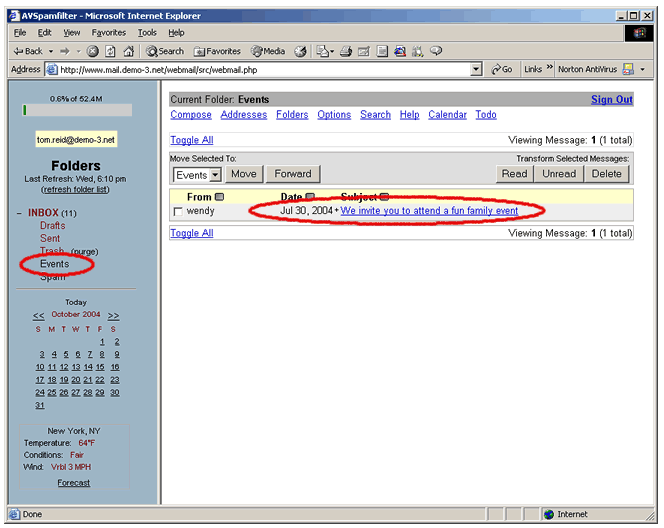
2. Click on the 'Events'
folder and the saved message appears.
Return
to Support |

